For a custom event-based sampling data collection, set up the Sample After Value (SAV) that is a frequency with which the Intel® VTune™ Amplifier interrupts the processor to collect a sample during hardware event-based data collection. SAV is measured as the number of events it takes to trigger a sample collection.
A Sample After Value that is too small causes the sampling interrupts to occur too frequently, which can lead to performance degradation and system instability. VTune Amplifier enforces a floor value to prevent such behavior. The recommended value is 1000 samples per second per processor.
For example, running at one GHz, a Sample After Value of 2,000 for Clockticks means 500,000 samples per second and only 2,000 CPU clocks between samples. If the sampling interrupt consumes 1000 clocks, it means that the processor is spending 50% of its time responding to the interrupts. At the end of the target duration, the event-based sampling collector may have recorded 300 instruction addresses (or samples). However, 900 additional events may have occurred after the last sample was collected. The 301-st sample is not collected since the Sample After value dictates that a sample is collected only after every 300,900 and not 300,000 as stated in the calculation.
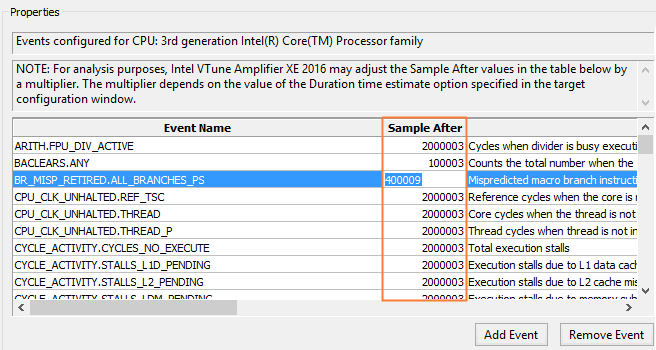
VTune Amplifier sets the Sample After value for hardware events automatically. For predefined hardware-level analysis types, the Sample After value is displayed in the Analysis Type window. You cannot edit the Sample After value provided in the table for each event. But during the data collection the VTune Amplifier may adjust it by a multiplier. The multiplier depends on the Duration time estimate option value specified in the Analysis Target tab.
For a custom hardware event-based analysis type, you may edit the default Sample After value defined by the VTune Amplifier for each event as follows:
- Click the
 New Analysis button on the VTune Amplifier toolbar.
The Choose Target and Analysis Type configuration window opens with the Analysis Type tab active.
- Click the
 Create New Analysis
Type button on the toolbar to create an analysis from scratch or click the
Create New Analysis
Type button on the toolbar to create an analysis from scratch or click the
 Create New Analysis
Type Based on Selected to base your custom analysis on a selected
configuration.
Create New Analysis
Type Based on Selected to base your custom analysis on a selected
configuration.
The drop-down menu opens.
- Double-click the Sample After value in the table and edit it as
required.